Assalamualaikom dear steemit family I hope you are doing great and will be fantastic . D o you know today im very happy that i cant imagine because i have done 3 achievements on steemit and now im doing the 4 achievement which is making me also excited ,In this achievement we will talk about markdowns and style they both are important for any of presentation. Because it gives value to the post and also easy to understand.
Now i will talk more about achievement 4 in detail here.
.png)
Markdown and Style:
you can use markdown as a simple syntax to formated output as a result and style ensures the markdown used across an article making them easier to read .
we must remember three goals:
- you should write text original and need to be easy and understand.
- the markdown file you make must be simle and update.
- the format style should be easy to learn and remember.
Applying Markdown and Style.
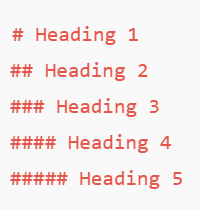
1) Heading:
when we are writting our post on steemit we need to write heading so lets learn how to use heading on steemit.
when we want that our heading look bigger so we only put # and then if we want to small the size of heading we need to put more ##.. the more we put #the more size will be look smaller of the heading.
example:
OUTPUT
HEADING 1
HEADING 2
HEADING 3
HEADING 4
INPUT
- Bold, Strike,Italics:
Bold:
We use two asterisks before and after the sentence without space between them.
INPUT:
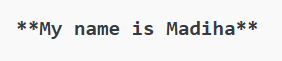
OUTPUT:
My name is madiha
Strike:
for this we are using two tildes before and after the sentence without space.
INPUT:
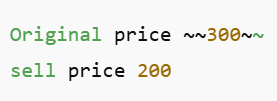
OUTPUT:
Original price 300
Sell price 200
Italics:
For italics we use asterisks before and after the sentence.
INPUT:
OUTPUT:
My name is madiha
3)How to center a text:
If you want to center the sentence then you need to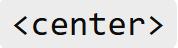 before the sentence and
 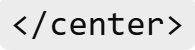 after the sentence without space between them.
OUTPUT:

Labours Day
4)How to add images and source images:
It is very easy to add an image you just need to drag and drop. Paste it from the clipboard and click select on them.
For source: we use the following comment [source] (link of image source)
For Example:
Input:
https://www.freepik.com/premium-vector/1st-may-happy-labour-day-celebration-design_222308571.htm
[source] (https://www.freepik.com/premium-vector/1st-may-happy-labour-day-celebration-design_222308571.htm
Output:
.jpeg)
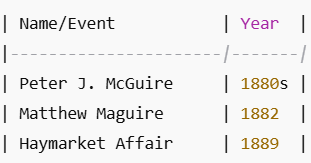
How to create table:
For creating a table we need to write a word which we want to write in the first column and then we need to write a word in the second column .
And also use this----- | ------ beneath these two words the example is given below.
INPUT:
STATE | YEAR
-------- | ---------
Peter J.McGuire | 1880s
Matthew Maguire | 1882
Haymarket affair | 1889
OUTPUT:
6) How to apply bullet:
for applying bullet we just need to put an asterisk and then add space after that write world so the example is given below:
INPUT:
* The labour day first named by Peter J.McGuire in 1880s
* Matthew Maguire after that named the labour day in 1882
* Haymarket affair named the labour day in 1889.
OUTPUT:
- The labour day first named by Peter J.McGuire in 1880s
- Matthew Maguire after that named the labour day in 1882
- Haymarket affair named the labour day in 1889.
There are many more mardown which i know about so for this achievement these six are enough.
Thanks a bunch for reading my post.
Congratulations, but did you notice it's no longer needed to post achievements?
It's good to see you learned a lot so all that's left for me is to wish you a lot of fun on Steemit.
A creative weekend.
Downvoting a post can decrease pending rewards and make it less visible. Common reasons:
Submit
This is so helpful
Downvoting a post can decrease pending rewards and make it less visible. Common reasons:
Submit